-
English
Compared with traditional flat LED displays, a spherical LED screen delivers far stronger visual impact. Its 3D form immediately captures attention, enhances spatial aesthetics, and creates a distinctive visual centerpiece. In addition, it supports video advertising, brand storytelling, and architectural lighting decoration—all in one solution.
Toosen’s spherical LED screens take this further. They use a trapezoidal circuit design to achieve seamless splicing without gaps, edge lifting, or glue failure. Moreover, high resolution and high refresh rates ensure smooth, vivid, and lifelike visuals. As a result, these displays are widely used in museums, planetariums, science centers, exhibition halls, stadiums, and youth activity centers.
In practice, installation methods typically include suspension mounting, base mounting, or fixed installation. However, the exact solution depends on the project. Below, we walk through a real-world example—a 5-meter outdoor spherical LED screen—to demonstrate the installation workflow.
Before starting the installation, you should prepare the right tools. This step ensures both efficiency and structural reliability.
With proper tools in place, you reduce installation errors and improve workflow speed.
First, communicate clearly with the client. Understand their application goals, installation environment, and expected visual effect. Based on this, determine the optimal screen location.
At the same time, balance visibility and safety. You want the display to be highly visible while remaining structurally secure.
Next, conduct an on-site survey. Measure key parameters such as:
Accurate data ensures a precise and safe installation plan.
Next, construct the structural framework. Typically, you should use high-strength steel or aluminum alloy to ensure durability and stability.
Depending on the installation type:
During this step, focus on structural integrity. The frame must withstand both the screen weight and external forces such as wind (for outdoor projects).
Equally important, maintain strict horizontal and vertical alignment. Precise leveling directly affects the final display quality and seamless assembly of the spherical shape.
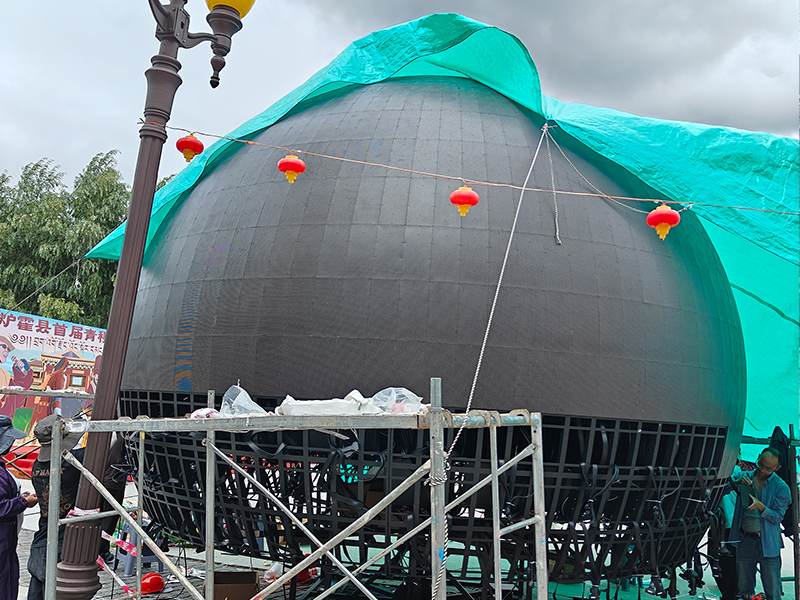
Once the frame is ready, begin installing the LED modules according to the predefined spherical layout.
Pay close attention to:
Toosen’s spherical LED screens use flexible PCB-based modules. Because these modules can bend, they conform naturally to the curved surface. As a result, you achieve a smooth spherical structure with seamless visual continuity.
After completing the physical installation, move on to electrical integration.
Plan the cable routing carefully:
Then, connect the screen to:
Stable connections are critical for long-term operation and signal reliability.
Finally, perform system testing and calibration.
Power on the screen and check:
If you detect any issue, resolve it immediately before project handover. Proper debugging ensures optimal performance from day one.
In summary, spherical LED screen installation requires careful planning, precise execution, and systematic testing. While the general workflow remains consistent, each project may require customized solutions based on site conditions and design goals.
If you are planning a project, professional support makes a significant difference. Toosen focuses on creative LED display R&D and manufacturing, with over a decade of project experience. The company supports fully customized solutions in various sizes and shapes, helping clients turn complex visual concepts into reality.
+86 18688923792
+86-755-23312336
4th Floor, Building B, Zhonghe Building, Taiwan Industrial Zone, 2132 Songbai Road, Shiyan Street, Bao'an District, Shenzhen.


Emall us with any questions or inquiries or use our contact data.We would be happy to answer your questions.
Copyright © 2010-2026 Toosen LED All Rights Reserved
Theme by WordPress